January 2016 Challenge

Update February 14, 2016.  Woo Hoo!  I won a Sponsor’s Choice award for this soap!  Thank you Majestic Mountain Sage!

A new soap technique challenge with Amy Warden and Great Cakes Soapworks.  Called the circling Taiwan Swirl (not too catchy, but it works) I only made one batch for this challenge.  It’s being judged on the “lotus” that can show up on one end of the loaf.  I personally like the the other parts of the swirl better.  (but, I’m not in charge ;*)

I used a bastile recipe very high in olive oil so it would stay workable.  I used purple, neon green,  pink and blue micas to color my batter.  I used a lavender, orange, patchouli blend to scent this.  It stayed quite liquid and I really love the swirls on the other bars.   (I can’t cut straight to save my life!  You’ll see in the pictures.)

I waited till the very last minute (literally) to submit this; I was waiting for the sun to come up.  The sun did not cooperate, so I used a light box to take photos.  So, the colors are not as good as they would be outdoors.   (The pink looks orange here.)  Anyway, I love swirls and neon green and the other colors

Taken outside.

taiwan outside 2


These are the most true to color.


taiwan middle bars

I had removed the original pics taken in a light box as the colors were really off.  I decided to put them back as a comparison of natural light and artificial light.  What a difference!

tiwan circle challenge

taiwan 3

New from old(er)

Lots of blowing snow today.  Instead of driving the highway into Wasilla to work, I preferred to live another day.  Staying home and will make up the day later.

An update on the carrot soaps I made a few weeks ago.  All INCREDIBLE soap!  So luscious on the skin.  But… batch three had lather just a bit more yellow than I wanted.  (batch three below)carrot 3

So, even though I loved the striking look of this soap, I decided to rebatch it.  Rebatching soap involves shredding or grating it and melting down to add more ingredients or use in another soap.  Since I wanted to tone down the yellow, I added the shredded soap to a new batch of luxurious plain soap.  Then the whole shebang sat in the crockpot to soften and meld together.  Still very beautiful, just different.  Annatto seed and carrots are what give it this beautiful color.  I like it better now!

carrot rebatched pretty11.19.15

Testing Soap Additives

People in soaping groups are always looking for info on how soap additives behave and the right amount to use.  I tested some additives today to see how these perform and  if I want to incorporate them into my soaping work.

My recipe is olive oil 70%, palm kernel oil 23%, and apricot kernel oil 7% with a 6% superfat.   My soaping temperature was about 100 – 105.  Totally awesome recipe and it stays fluid for the 10 – 15 minutes it took me to measure and mix the samples.

Additives tested:

  • Indigo
  • kelp
  • vanilla powder
  • pearly white mica (Brambleberry)
  • honey powder
  • carrot powder
  • anatto powder
  • alkanet
  • marshmallow powder
  • mica dribble
  • control (no additive)

Each additive was a measured 1/4 tsp per (about) 4 oz batter.  The one exception was one kelp at 1/4 tsp and one at 1/2 tsp.   Additives were added dry to batter and whisked in, except a couple that wanted to clump were stick-blended.   The honey powder was mixed with a little water (1/2 tsp) and then batter added and mixed.

My shop is not heated so these will not gell and none are fragranced.  I should have done another round of samples and gelled them; a job for another day!

Here are pics of just poured soap samples.

ADDITIVE TEST 10.17.15ADDITIVE TEST 2, 10.17.15

Tomorrow I’ll unmold and take more pictures.  Then, a four week cure and, after that, I’ll lather up and see how they do when used.

On to another soap challenge

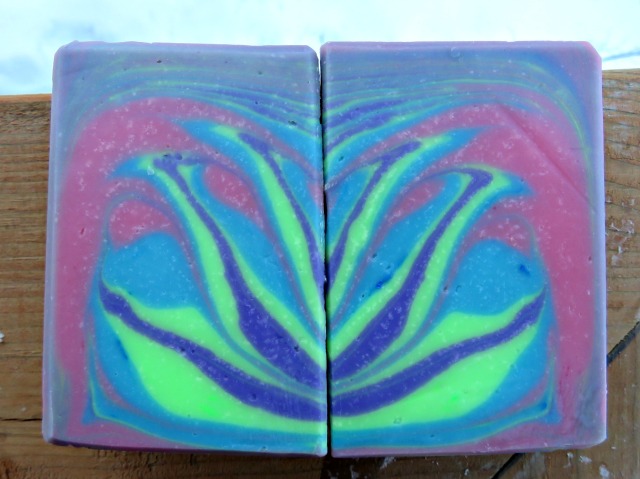
The October Challenge through Amy Warden’s Great Cakes Soapworks is using alternative liquids for the water in the soap.  In past soaps, I’ve used beer, coconut milk, chamomile tea  and water; all those are incredible.  So, to cut to the chase,  this is my entry.  Scented with an essential oils of Lavender, Rosemary, Patchouli, Orange, and Bourbon Geranium.carrot 3

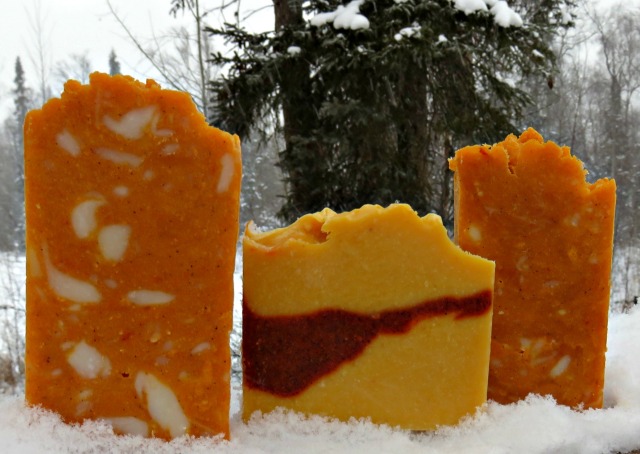
In case you don’t want to read all this, here are all three batches I made.stack o carrot soap


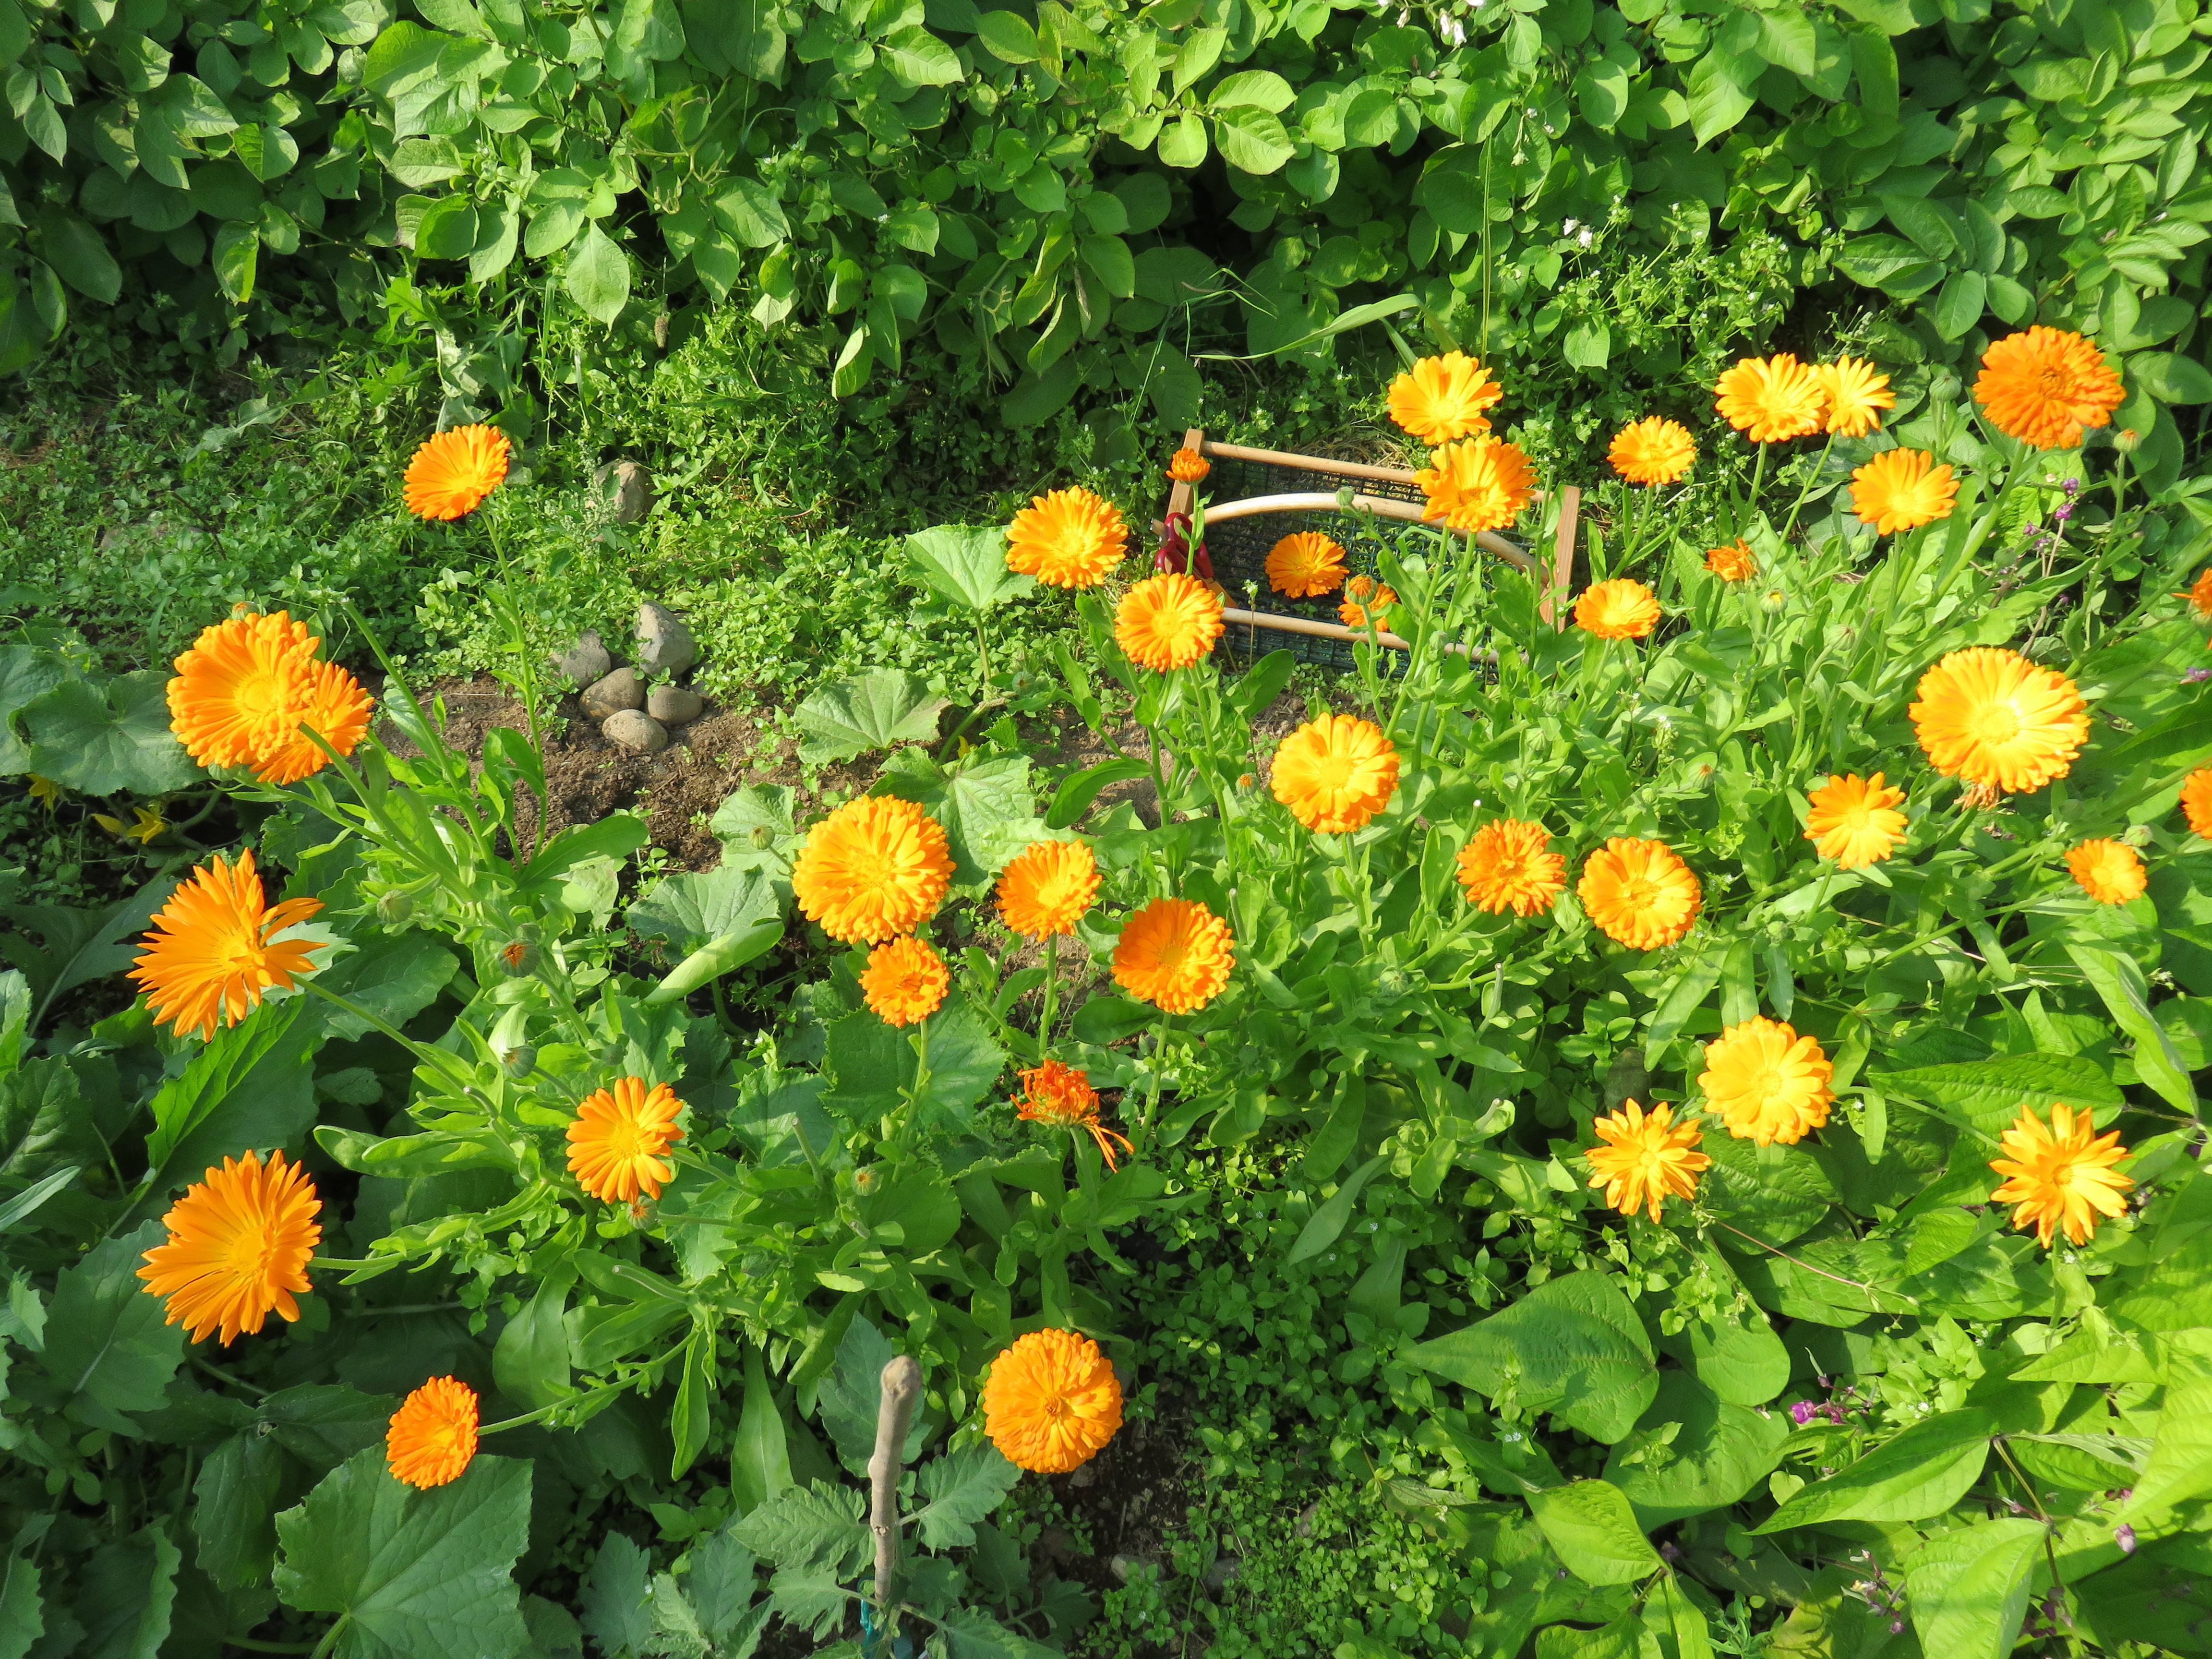
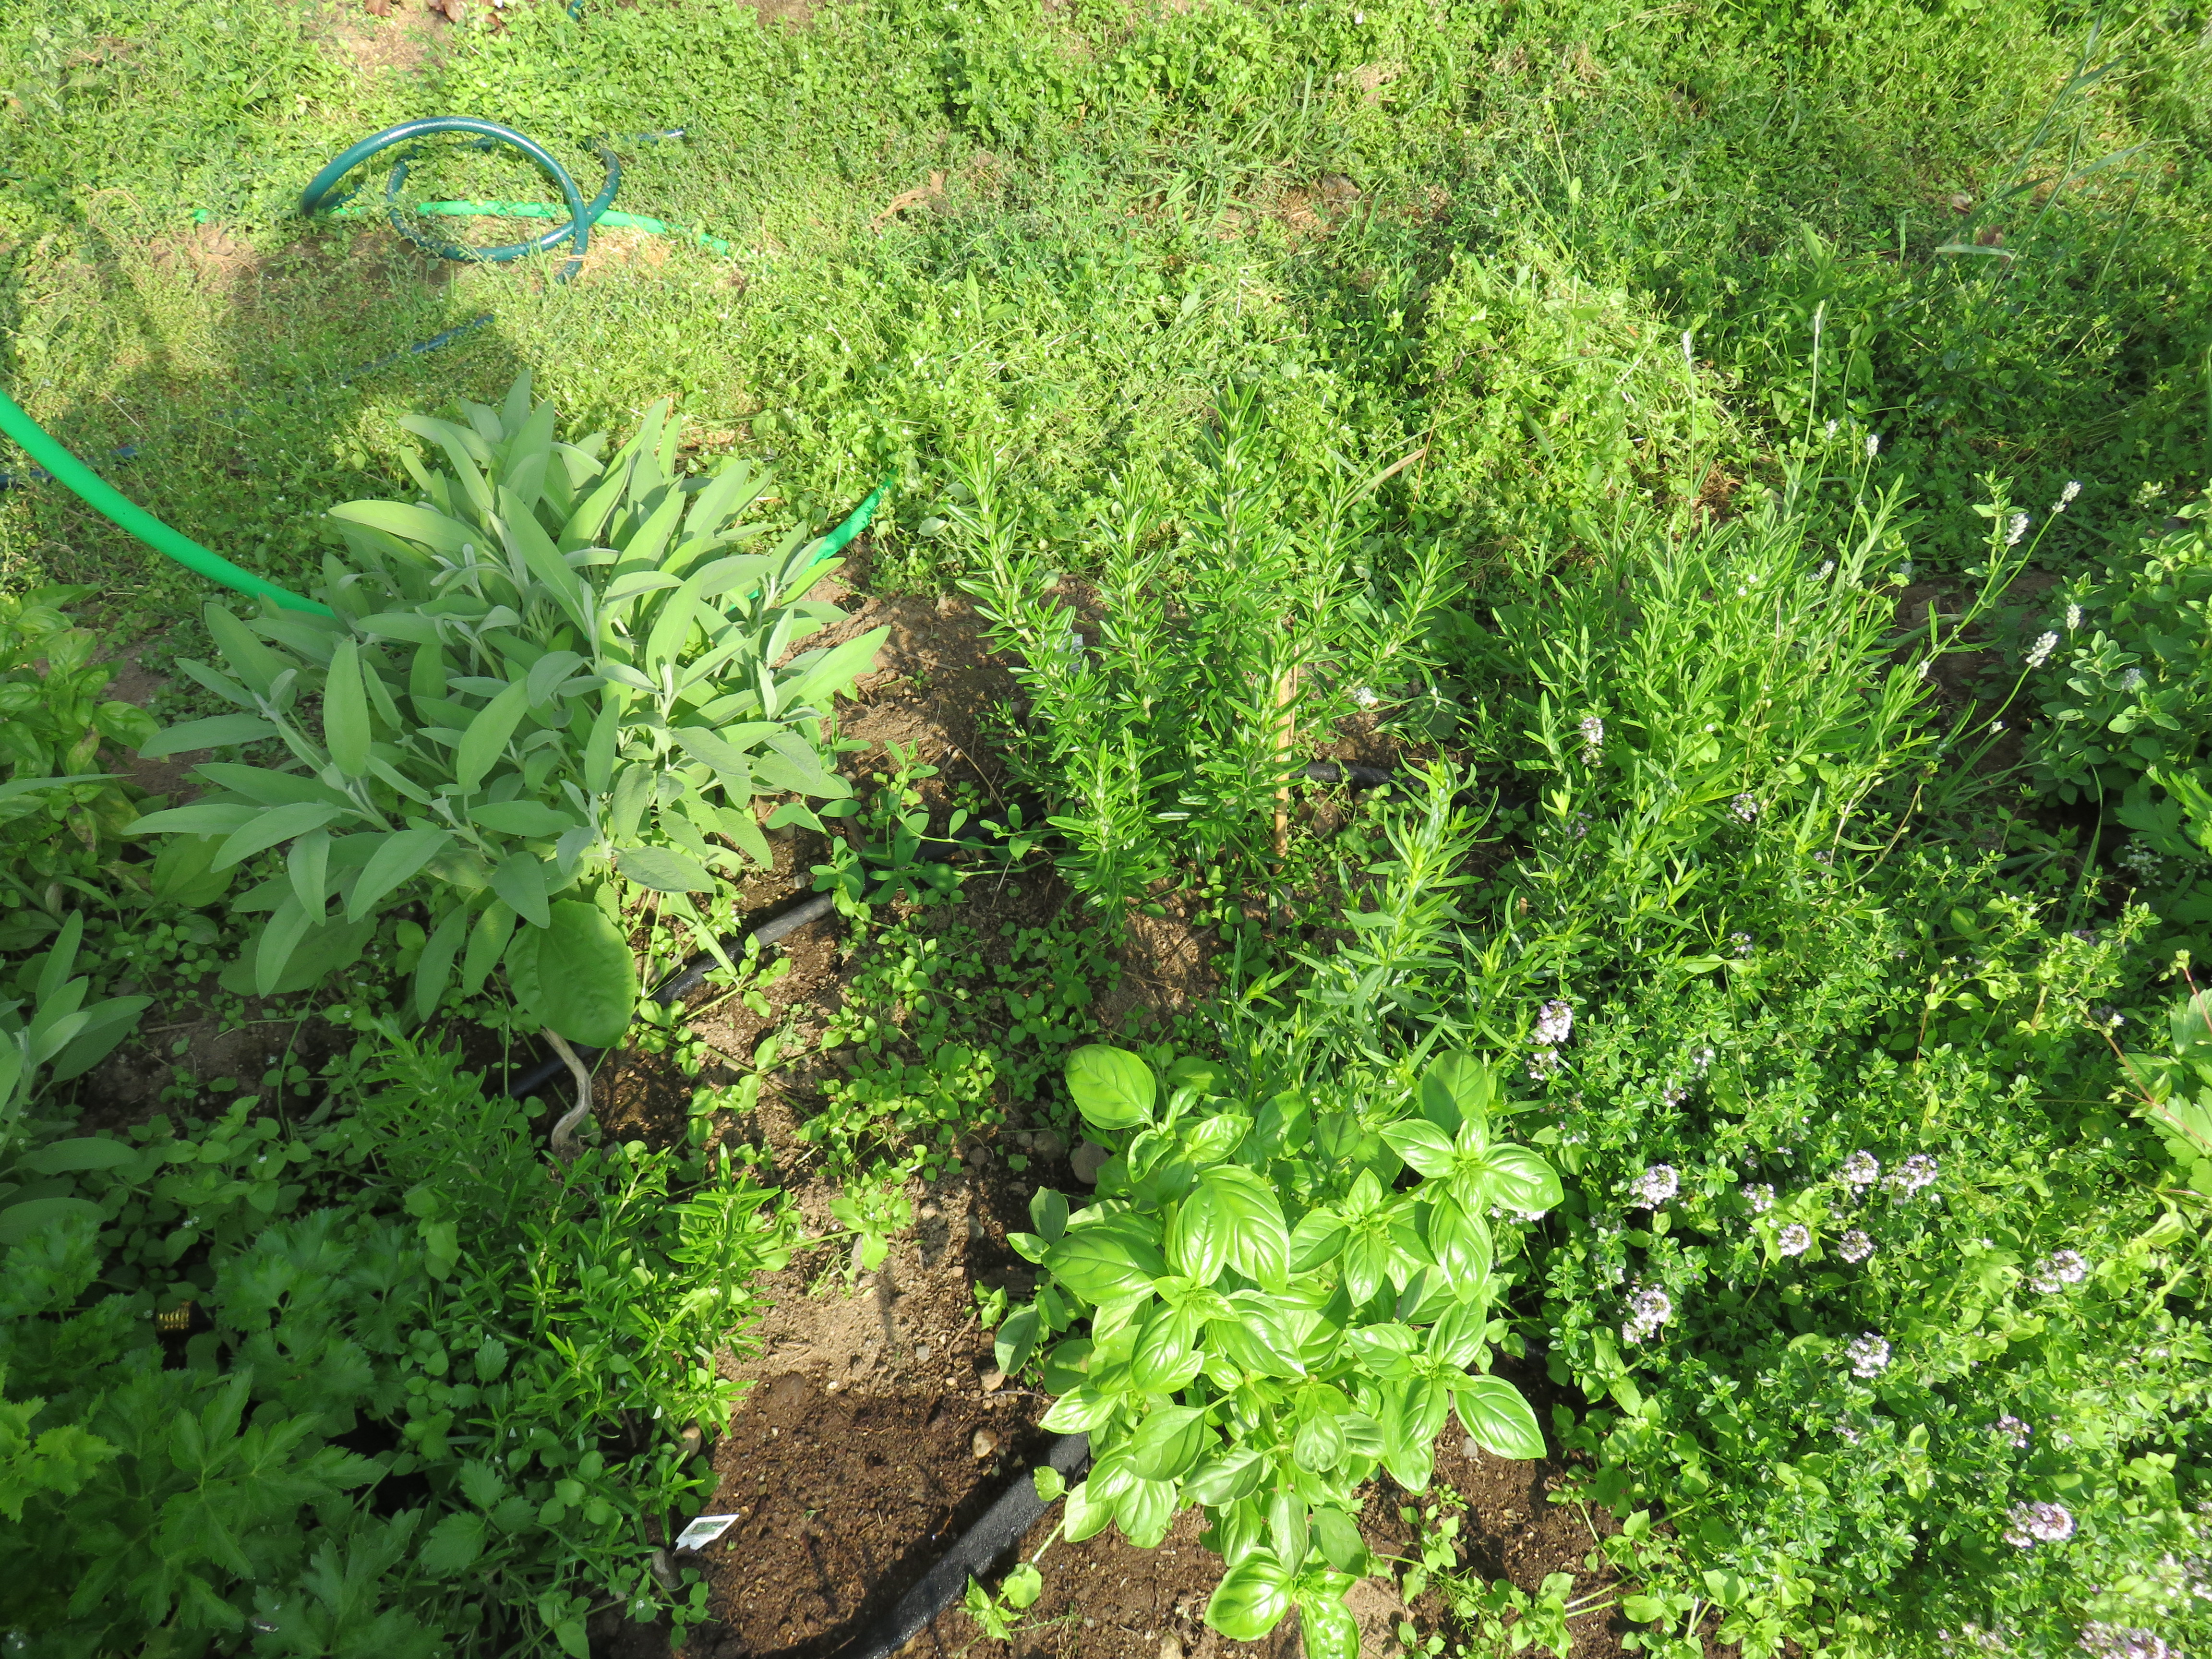
We have been working hard this year with our expanded garden and I have nurtured several wild plants.  So, I decided to use a tea made with my homegrown calendudula and rosemary, wild plantain, wild chamomile and chickweed.  After washing the wild plants, I brought my water to a boil and added my botanicals.  They simmered for about 5 minutes, then covered the pot and let them steep for about 30 minutes.  I cooled it and strained the liquid for my soap.  Because I used natural botanicals in my liquid, it seemed like a no brainer to continue that theme.  I added a bit of aloe to the liquid, bamboo silk, a bit of sugar (for lather) and then the lye, and let that cool.

herbal tea
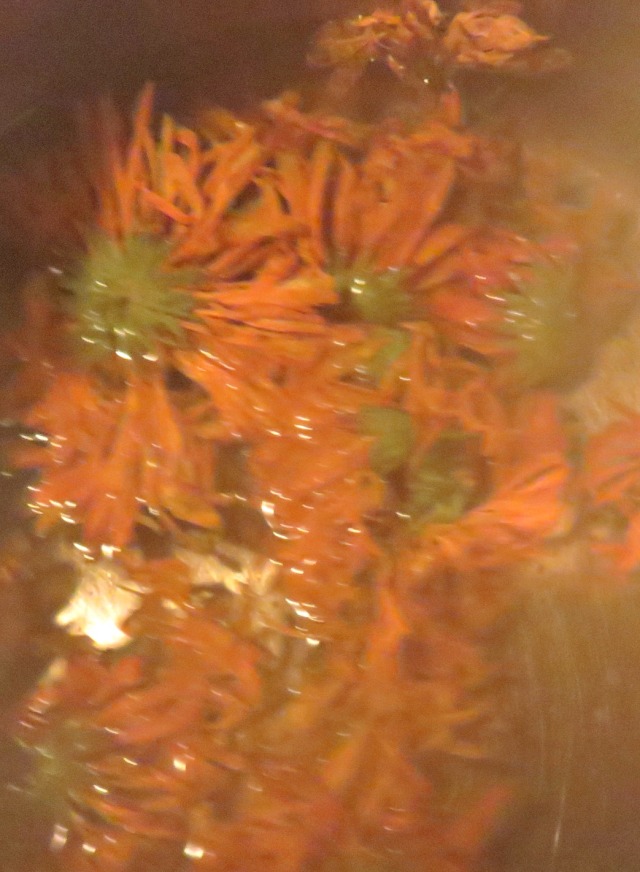
Making my herbal tea

I wanted a soap that would be natural, but incredibly luxurious.  I used olive oil, castor oil, coconut oil, apricot kernel oil, and shea butter.  This has very high moisturizing qualities and should be an awesome soap.  The herbal infusion, aloe and silk will take it over the top.  For scent I used a blend of essential oils that included lavinden, patchouli, grapefruit, ylang ylang and rosemary.  I planned on three layers, with a light sprinkle of vanilla bean seeds between layers.  The bottom layer would have annatto powder added to give a deeper orange color, the middle layer would be the natural light yellow from the oils and herbs, and the top layer would have carrot powder for a little different orange color.  I would pour each layer with the mold tilted to give a bit of drama.

I poured the lye solution into my weighed and cooled oils, blended and started.  It did seem to thicken more than I thought it should, but I’m pretty good managing thick soap batter.  Finished my last layer and texturing the top, and began thinking why is this mold only 3/4 full.  This should be full to a little over the top.  What the heck…  Back and checked the recipe.  Hmmm… I didn’t pour any olive oil.  Curses!!!! D#*!*#!@ it!!!!!

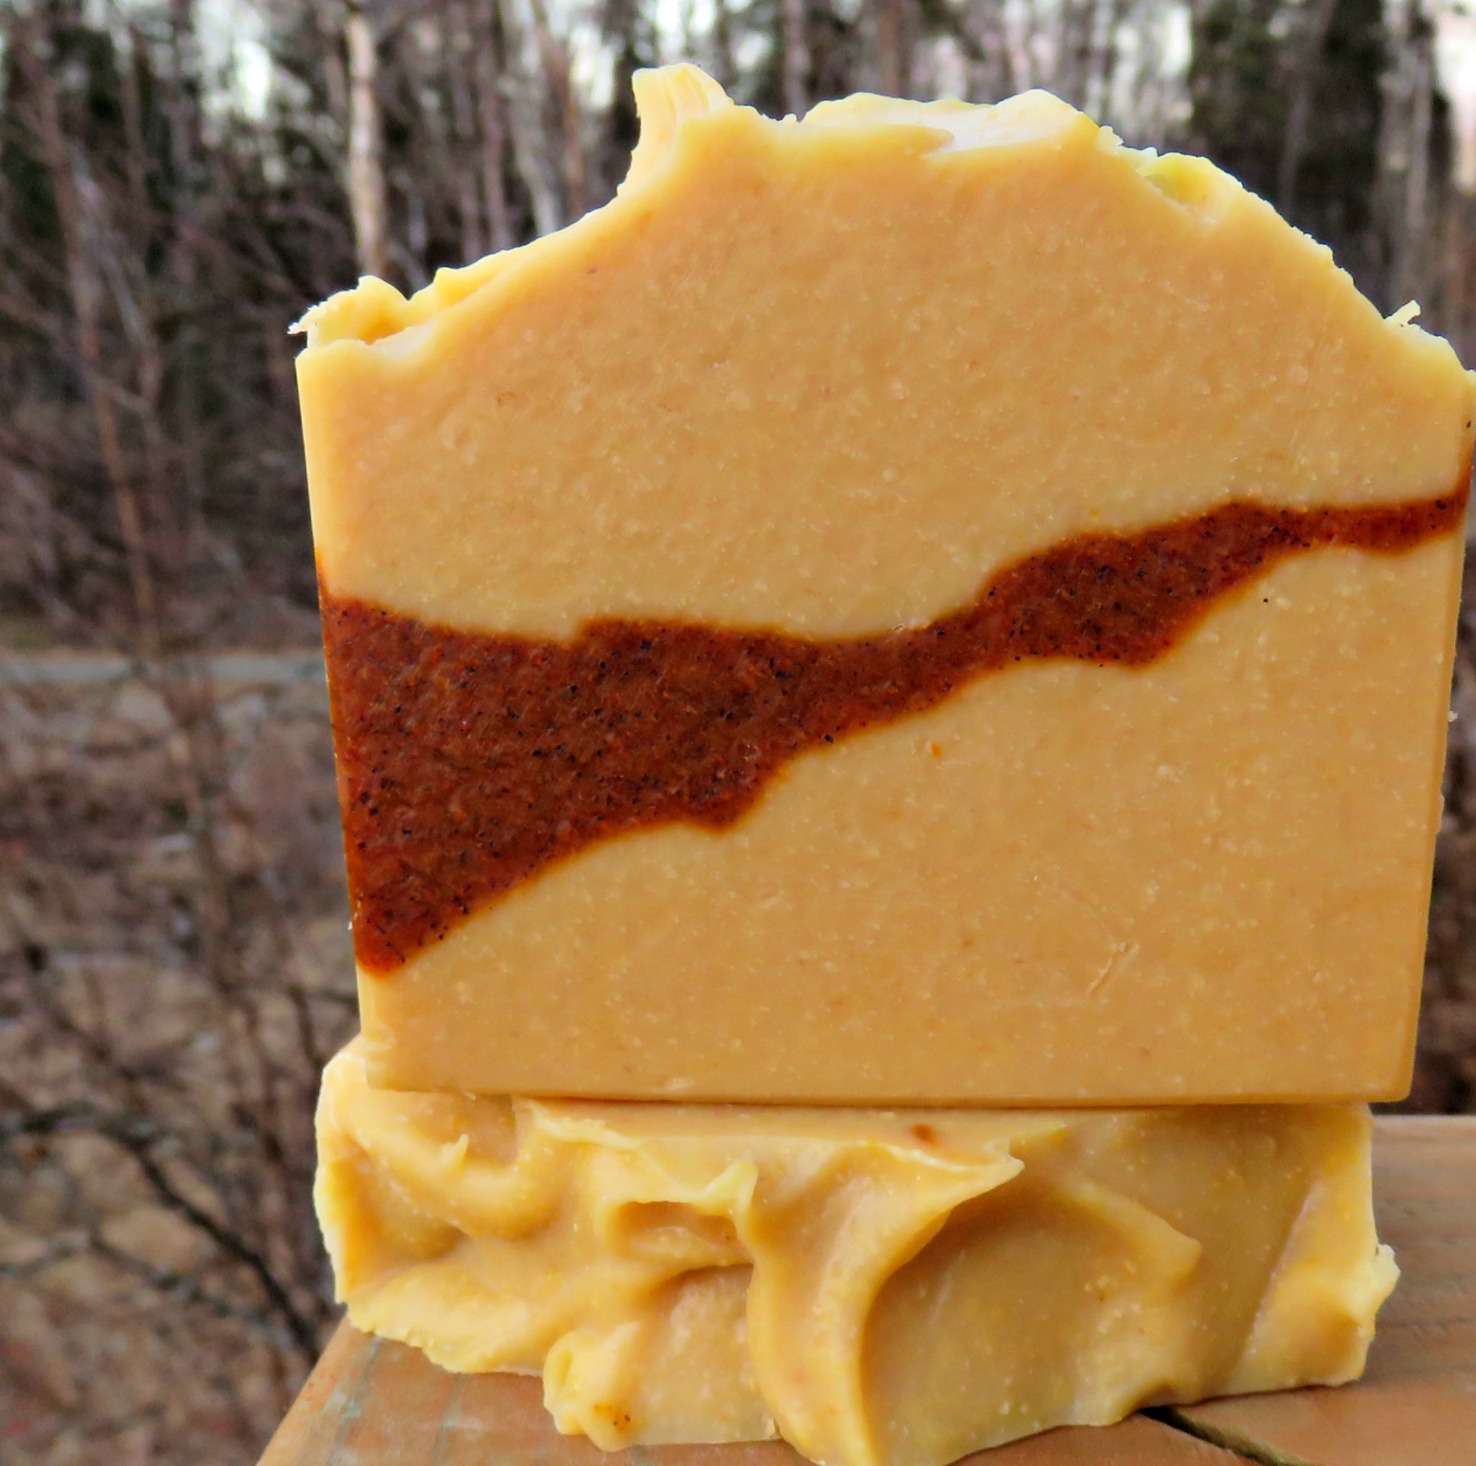
So, scooped my lovely soap out and added the missing oil and blended the heck out of it.  This time I poured half the batter with the mold tilted and a dusting of vanilla seeds and the rest of the batter.  Well, it is still going to be an awesome soap, just not the planned one.  I still have enough herbal infusion to make another batch.  Out to the shop I go!

Batch one.  (I love annatto seed in soap!) carrot one batch


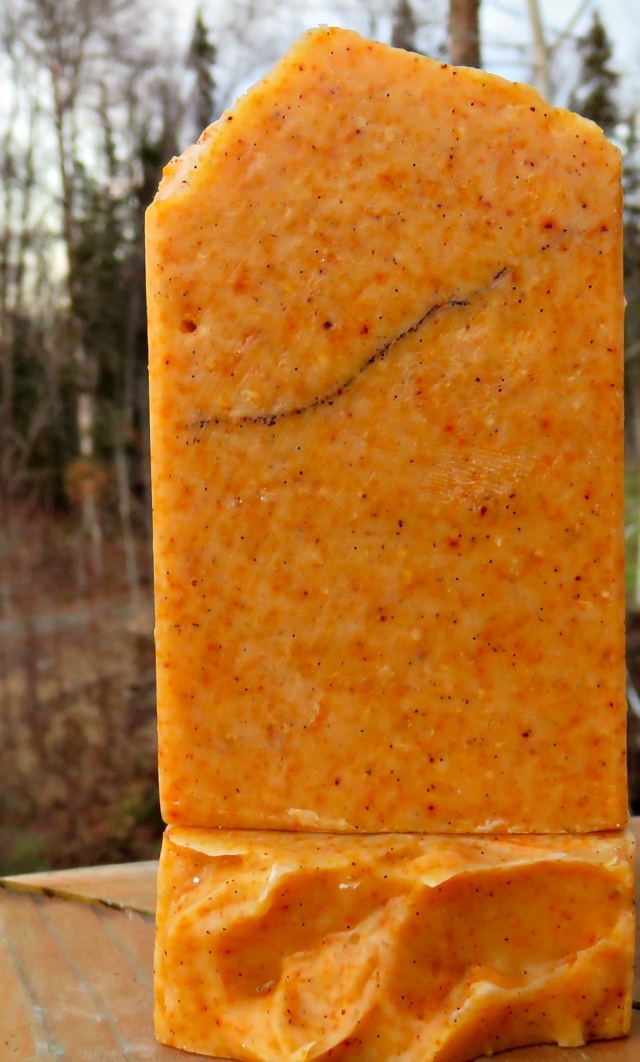
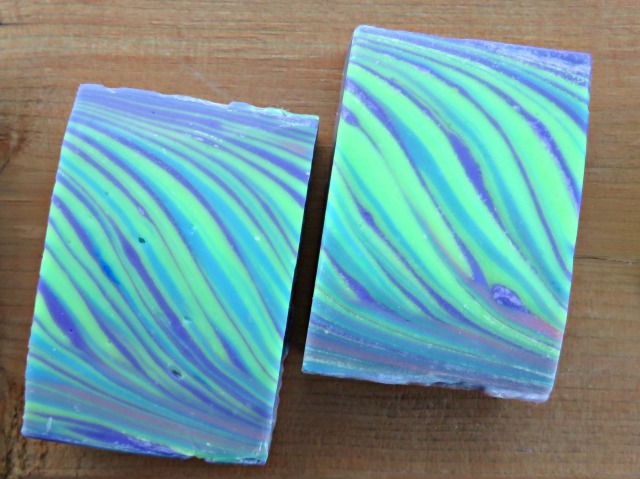
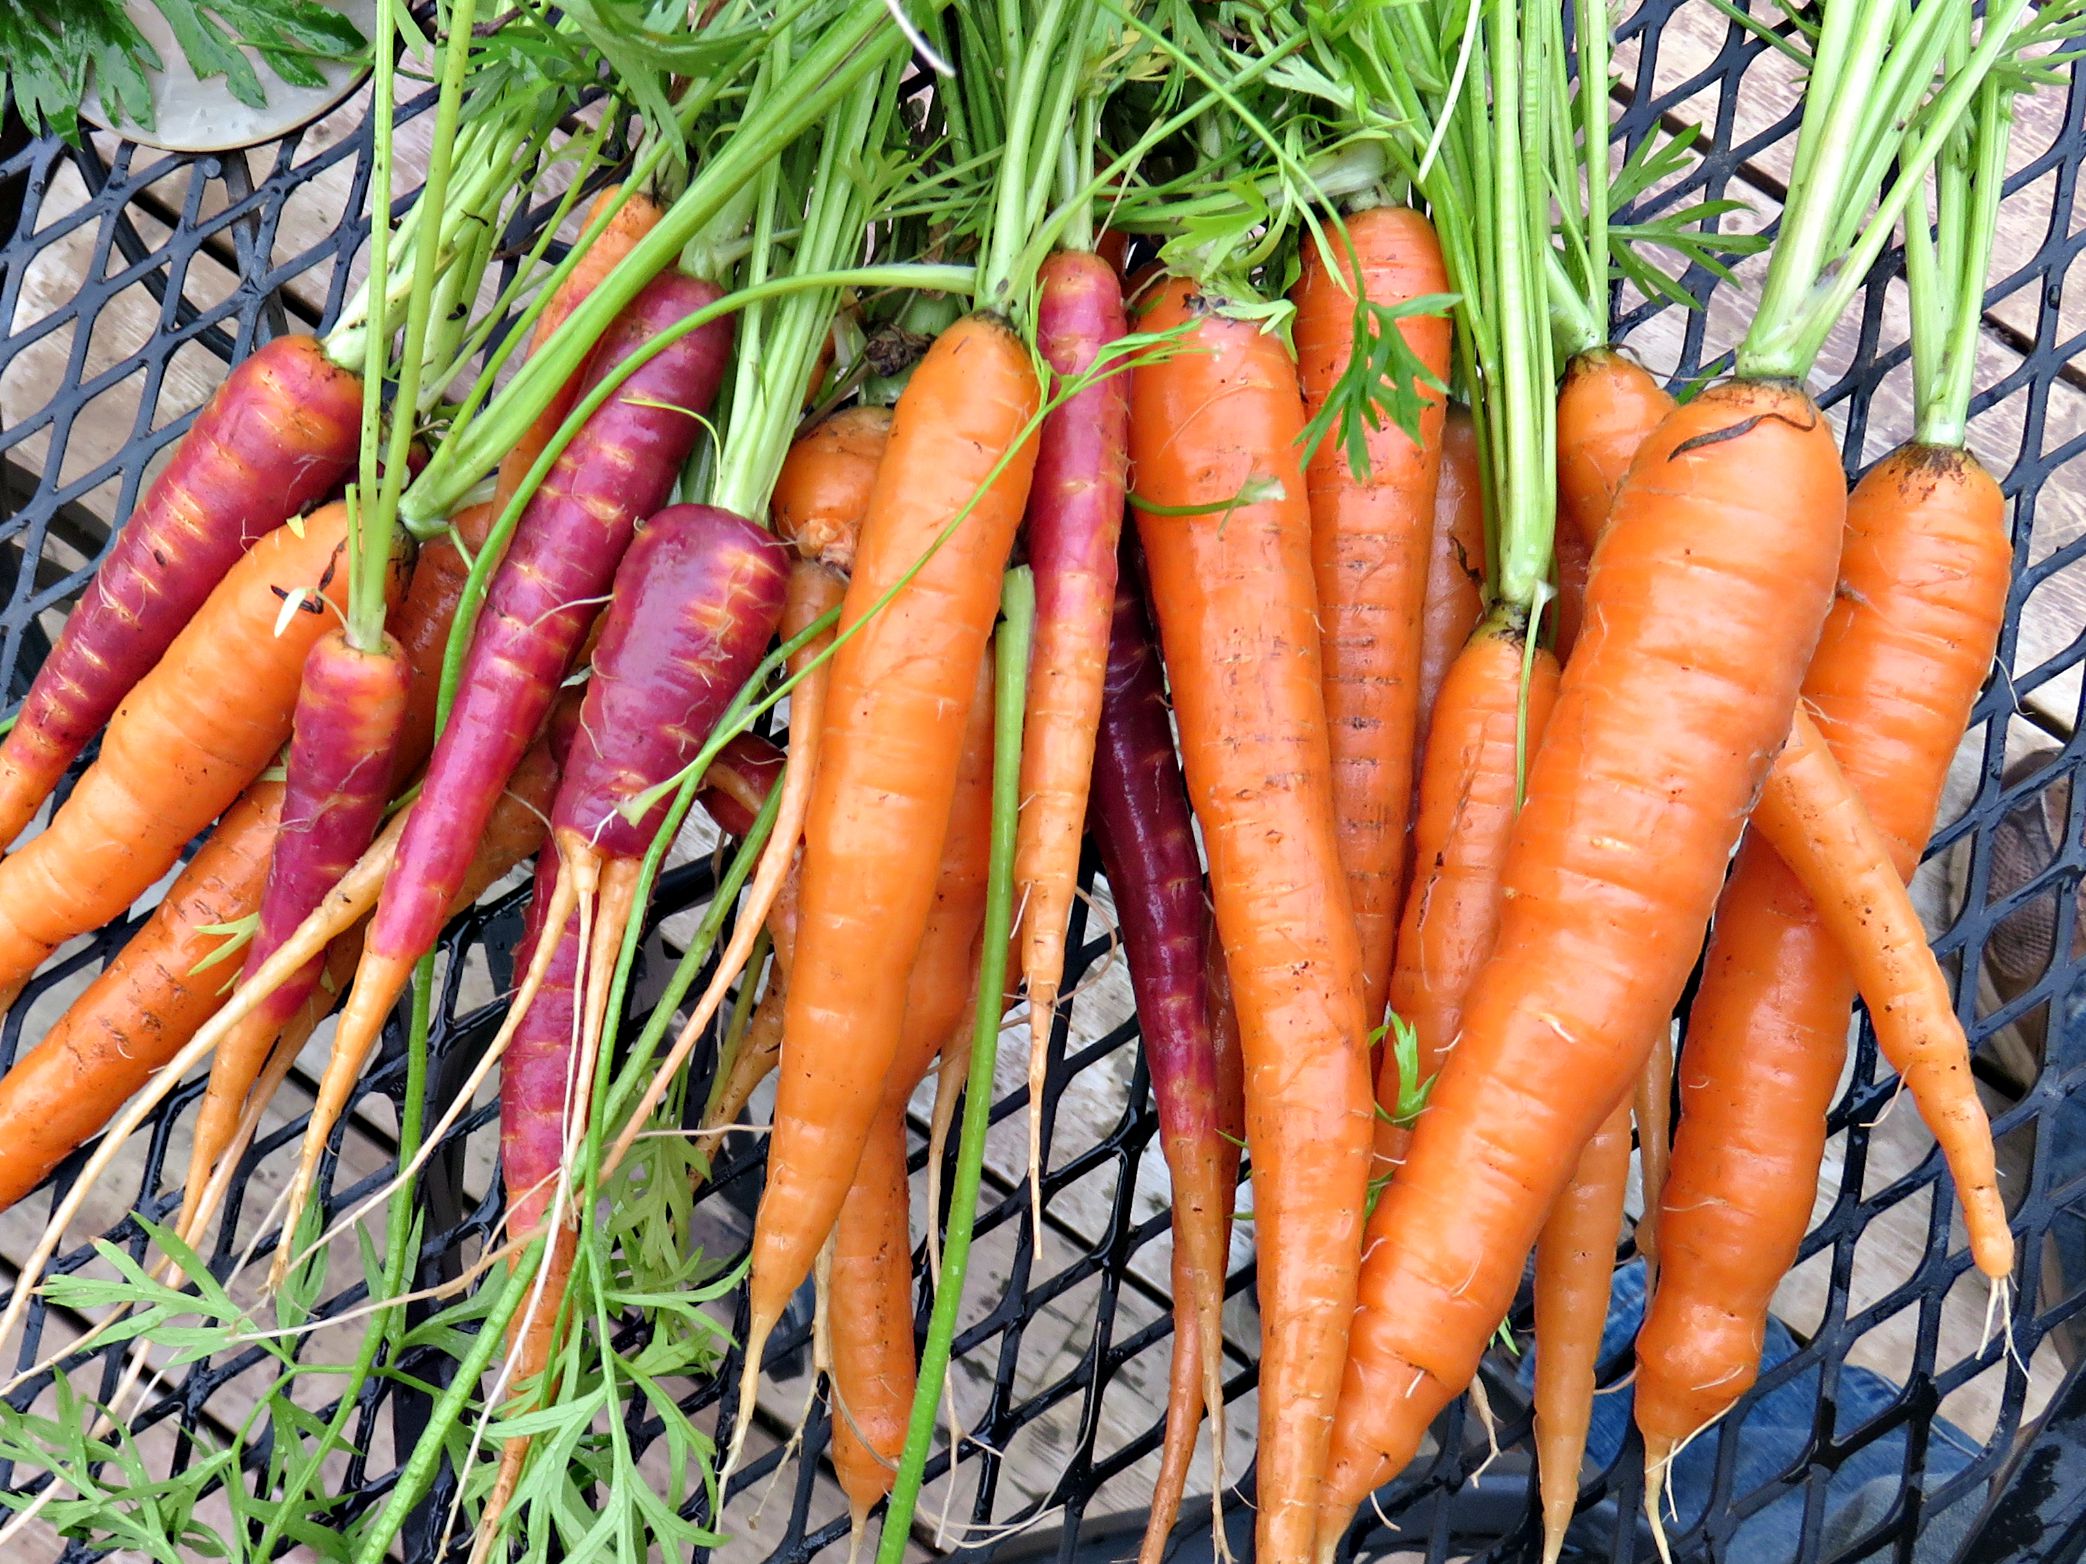
On to round two, I decided to use my fresh homegrown carrots in addition to my brewed herbal tea in this batch along with locally made birch syrup.    To make a long story short, I lightened part of the batter with titanium dioxide for to give a layered look and glitter on top (I LOVE glitter)  Amy graciously reminded me no t.d., and no glitter.  Well, bummer.  I was running out of time and not sure I wanted to put more time into this, but decided just one more.

carrots 2015
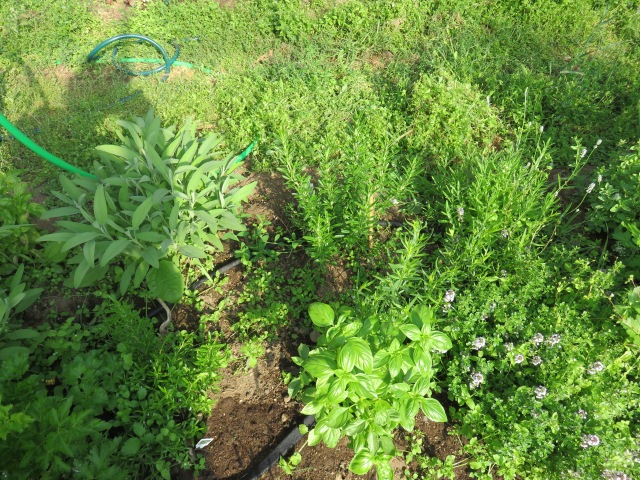
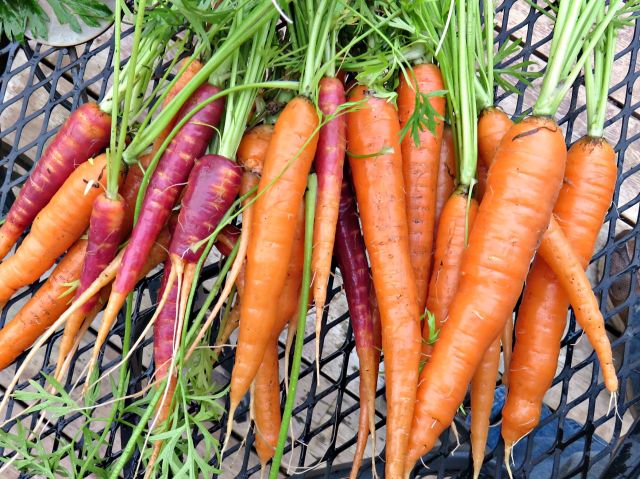
Some of my carrots, and below, Calendula.  Below that, herbs
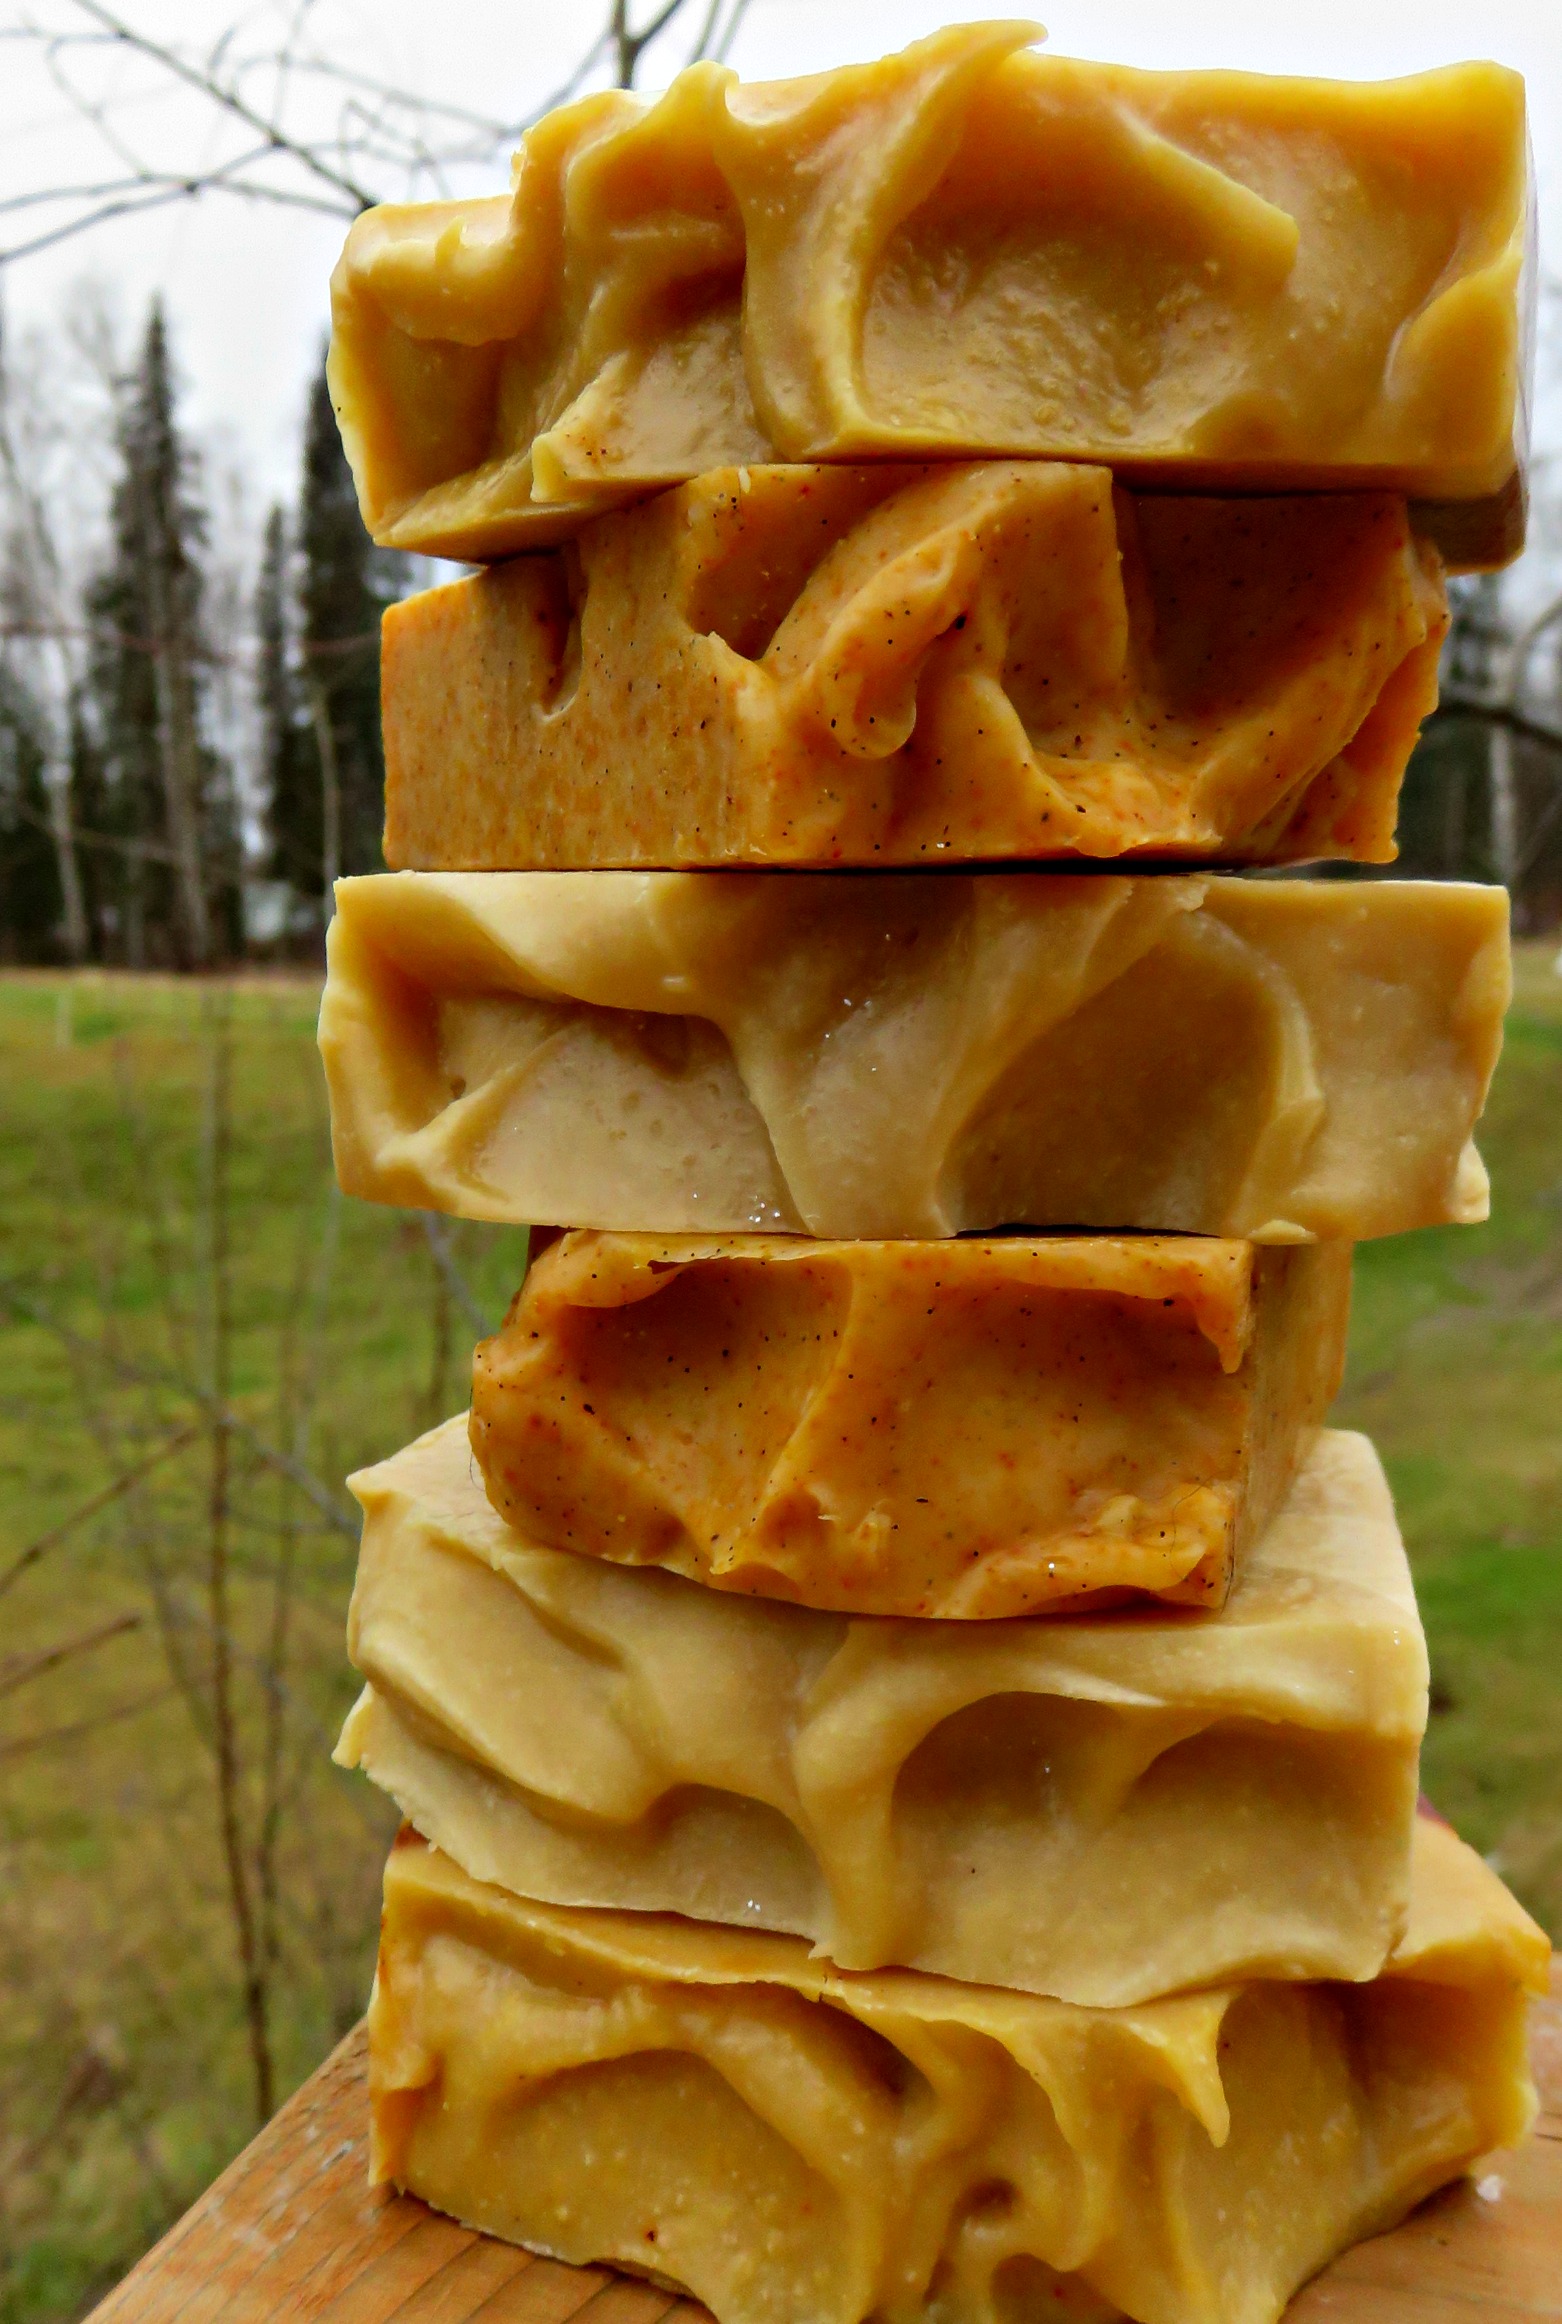
IMG_1151IMG_1098Batch two

carrot 2

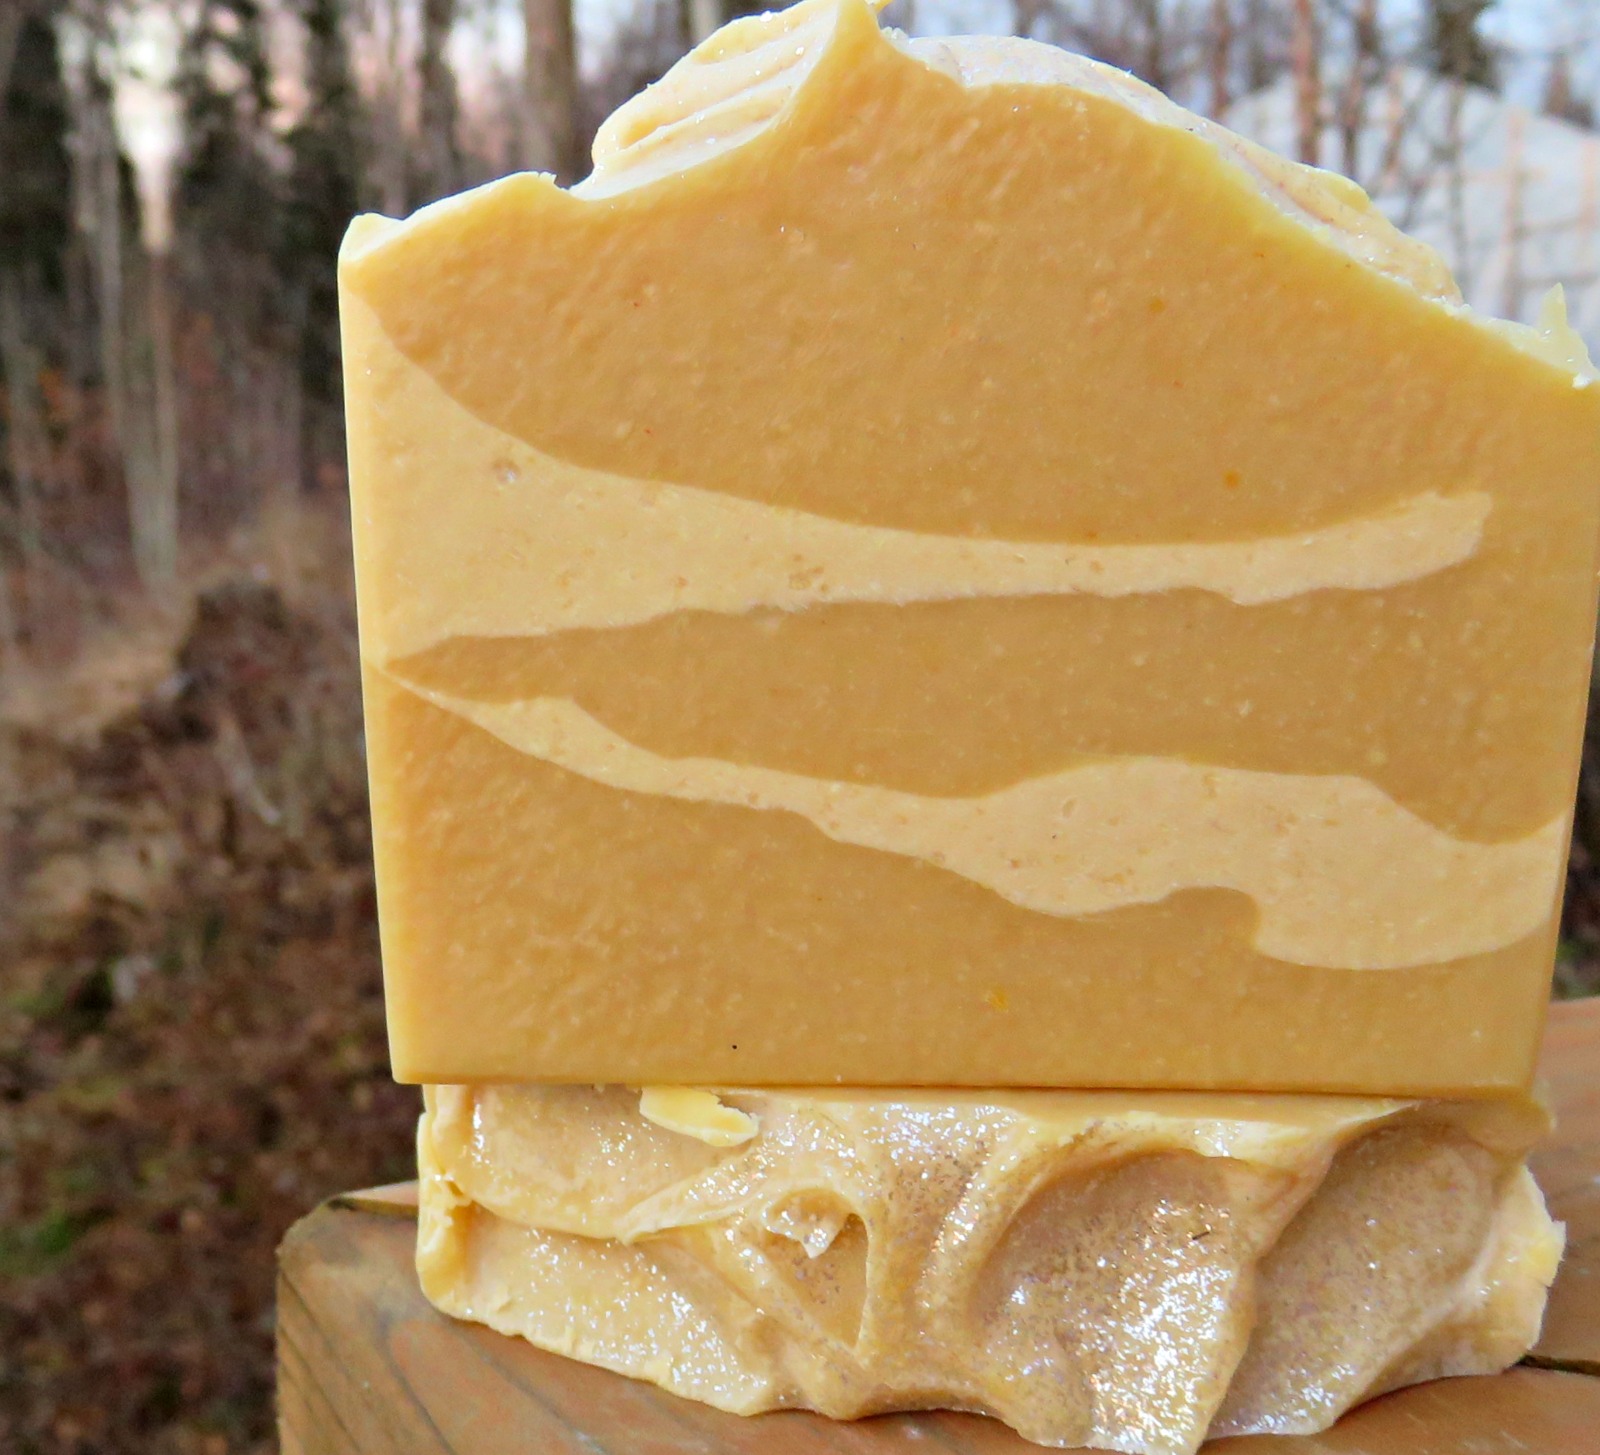
Round three.   For the liquid, my brewed herbal tea with a bit of aloe powder and my fresh homegrown carrots will also be part of this batch.  Cooked and pureed the carrots (If you need more info on the benefits of carrots besides vitamins and beta carotenes, please check WebMD; good plain English info)   and (once again) added local birch syrup.  Birch syrup is locally produced, has fructose which helps lather and is a sustainable product.   I added annatto seed powder (Annatto also contains very high concentrations of carotenoids, chemicals in the same class as alpha- and beta-carotene.  Mountain Rose Herbs website)   to part of the batter to give a little interest, a little exfoliation and color.  The oils used are olive oil, apricot kernel oil, castor oil, coconut oil, and shea butter.  I also added raw tussah silk to the lye water.

My herbal tea was brewed with the following herbs, all from our pesticide free garden and yard.  I believe these botanicals are soothing and beneficial.  I does sound lovely on a label, and may have skin benefits.   (Check out the Mayo Clinic, WebMd, Rosemary Gladstar; pick your source!)

  • Plantain   “Medicinally, plantain leaf is approved by the German Commission E for respiratory catarrhs and mild inflammation of the oral and pharyngeal mucosa. It is traditionally used for upper respiratory support, and is topically used for minor cuts, bruises, and stings.  Plantain is very high in vitamins A and C and is also a rich source of calcium.”  (Mountain Rose Herbs website)  We have a local doctor who has prescribed plantain poultices for skin irritation.
  • Calendula  “Nicholas Culpepper, a 17th century botanist, herbalist and astrologist, mentioned using calendula juice mixed with vinegar as a rinse for the skin and scalp and that a tea of the flowers comforts the heart.7 Astrologically associated with the sun and the fire element, calendula was believed to imbue magical powers of protection and clairvoyance, and even to assist in legal matters. Flowers strung above doorposts were said to keep evil out and to protect one while sleeping if put under the bed. It was said that picking the flowers under the noonday sun will strengthen and comfort the heart.11
  • Calendula was used in ancient times in India as well, and according to Ayurvedic healing principles is energetically cooling and has a bitter and pungent taste. It was employed as vulnerary, antispasmodic, alterative and used on minor wounds, as an eyewash, to soothe bee stings, and for digestive disturbances.12And, in traditional Chinese medicine (TCM), calendula (called Jin Zhan Ju) is considered energetically neutral and drying and is used to support healthy skin. Calendula is employed to move stagnant blood therefore increasing circulation to the skin.Traditionally, in Native American cultures, it has been employed to assuage ailments including occasional upset stomach. Traditional use mirrors many of our contemporary applications of this medicinal plant. Modern studies confirm its efficacy.4,15-18 According to herbalist Paul Bergner, calendula is an herb used for minor wounds that helps by bringing circulation to the area in distress. It can be used similarly to Arnica sp.,5,19 yet it is a much more mild plant that can be used on open wounds.”  (Mountain Rose Herbs website)
  • Rosemary   “Medicinally, rosemary is approved by the German Commission E to support healthy digestion. It is also approved externally for healthy circulation and alleviation of joint pain. The oil is frequently used for aromatherapy, and has been shown to enhance alertness.” (Mountain Rose Herbs website)
  • Rosemary is used topically (applied to the skin) for preventing and treating baldness; and treating circulation problems, toothache, a skin condition called eczema, and joint or muscle pain such as myalgia, sciatica, and intercostal neuralgia. It is also used for wound healing, in bath therapy (balneotherapy), and as an insect repellent.

http://www.webmd.com/vitamins-supplements/ingredientmono-154-rosemary.aspx?activeingredientid=154&activeingredientname=rosemary

  • Chickweed Used to help reduce inflammation of irritated and itchy skin, for insect bites, boils  The Boreal Herbal by Beverly Gray, page 65. Copyright 2011.
  • Wild Chamomile To help alleviate inflammation of a wound or for achiy, sore muscles.  The fragrance is known help you fall asleep.  The Boreal Herbal by Beverly Gray, page 59. Copyright 2011.

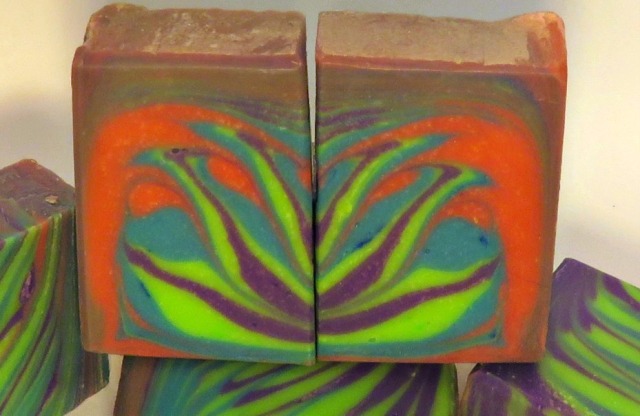
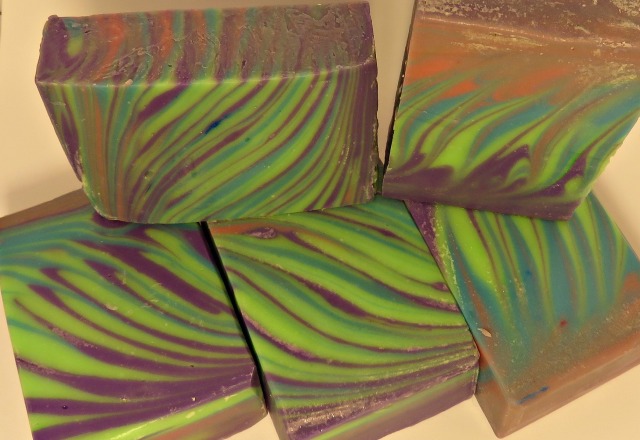
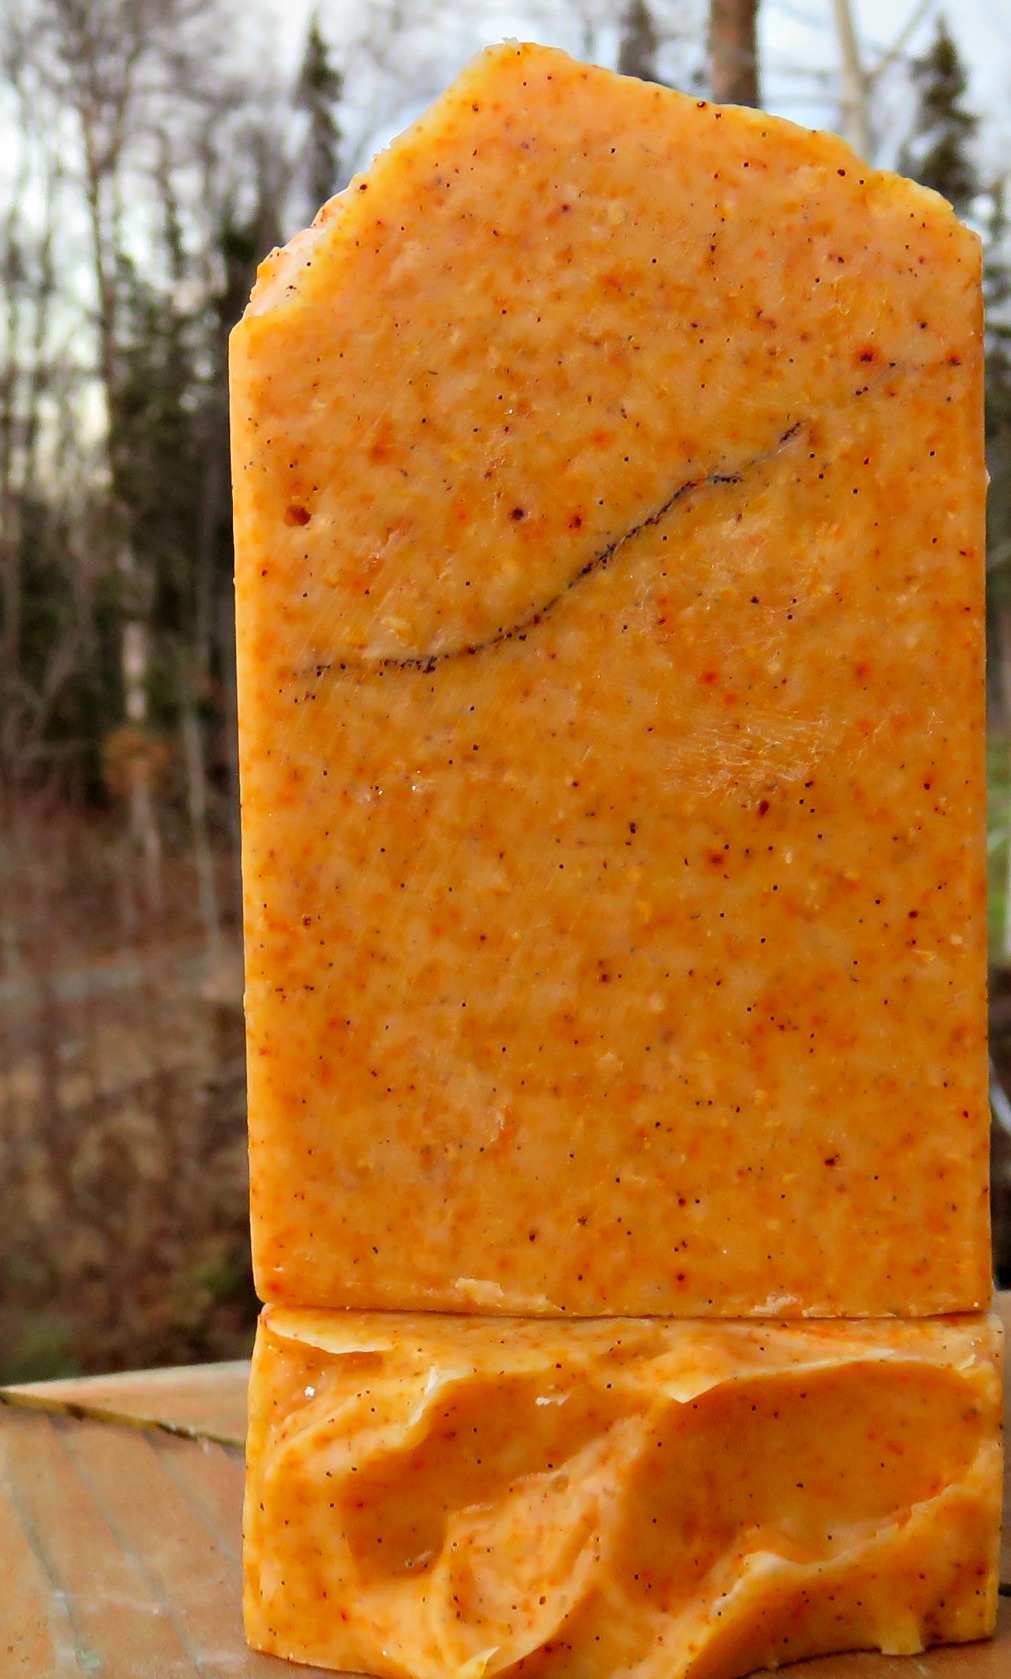
This batch turned out beautifully.  My camera died when making the soap, so I can’t show you just how richly dark orange the batter was.  It lightened considerably during saponification.  I might try again and not let it gell.  This is a deliciously awesome soap and the one I envisioned.  (This pic is of batch two with the offending glitter, but you can see how beautiful the color started out.  I may rinse the glitter off this batch!)
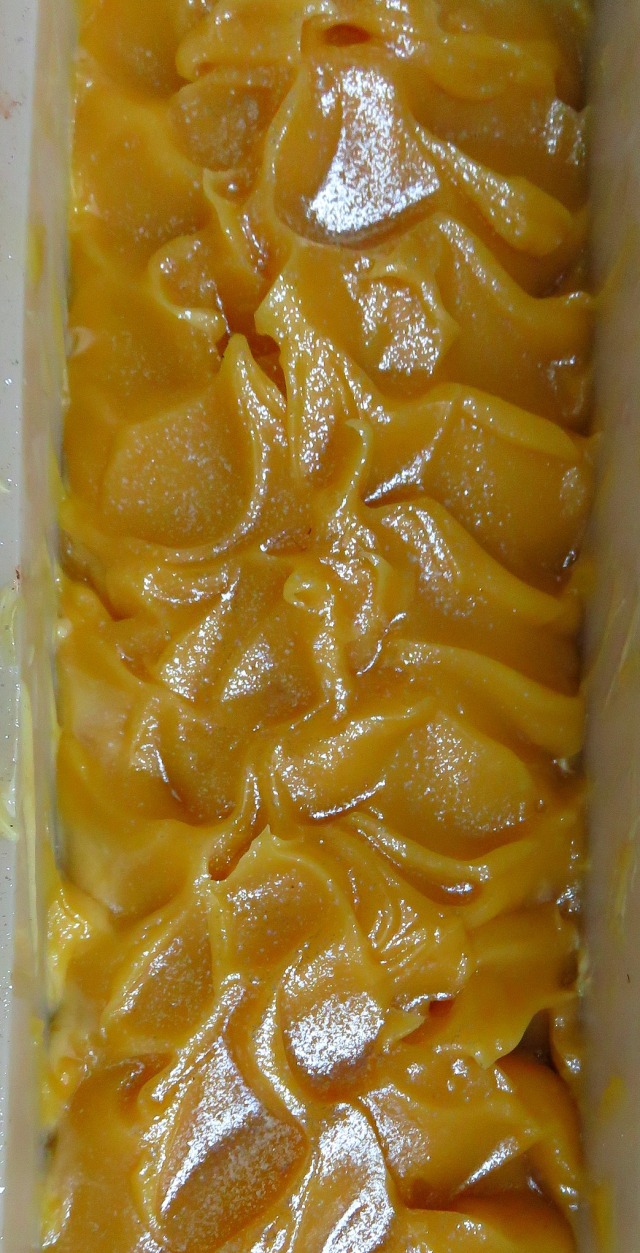
carrot top 2

Batch threecarrot 3


Lovely taters!

I wanted to share some of the beautiful potatoes we grew this year.  (I read The Martian and we saw the movie yesterday.  I’ll never think of potatoes again without thinking of Mark Watney!)

For breakfast this morning.  From the left, Yukon Gold and German Butterball, Peanut (in the middle), top right is Cherry Red, and lower right is Party.

taters not cut 2015

Here they are cut (with All Blue on the left and Magic Molly (purple, almost black).  Peanut at the top, Party have the pink streaks, German Butterball lower right, Yukon Gold lower left, All Blue left, and the purple-black in the center is Magic Molly.

beautiful taters cut 2015

Soon to be sauteed with sweet onions and eggs.  Deelicious!

beautiful taters 2015

Soap Challenge September 2015

Another soap challenge, this time using a technique by Clyde Yoshida of Vibrant Soaps in California.  He is quite an artist!  This challenge is hosted by Amy Warden of Greatcakes Soapworks.

I used a bastille recipe to give me time to work with the colors of red, yellow,green and orange against a background of white.  Scented with Them Apples and Home for the Holidays, both from Mad Oils.  Love the way this smells.  Very fresh green apples and a very light cinnamon.  Very Autumn!

My pour was a bit quicker than optimum; I think moving slower would have made it more interesting.  But still beautiful.

apple clyde slide 9.19.15

This is batch #2, scented with Sandalwood, Ylang Ylang, Bergamot, and Grapefruit.  Smells intoxicatingly AWESOME!   The pink top was going to go in the soap, but the batter thickened so quickly, the feathery swirls didn’t form.  Love it anyway.

clyde slide sandelwood, blend

Christmas Apron 2014

I recently visited my daughter and she was wanting a cute apron.  Bingo!  Mom can sew!  (IF ANY OF JOIE’S FRIENDS ARE READING THIS, DON’T TELL HER!  I don’t think she checks my blog!)  So, I made one for her for Christmas and it’s reversible to boot.  Hope she loves it.  I used a pattern from Sugar Pie Chic, the Simply Chic Apron pattern.  Very cute, and easy to make.  Also, the instructions are good.

My daughter loves mermaids and I had found a mermaid themed fabric last year with her in mind.  I figured I might as well make it reversible, since it doesn’t take much more work.   As you scroll through the pictures, keep in mind that I made a number of changes to this from the original instructions.

  • I made it reversible
  • I drafted a new pocket
  • The changes I made significantly changed the construction steps in the pattern directions.  Unless you’re an experienced seamstress, just follow the instructions.

Here is the bodice, one side has the mermaids, the other side is a coordinating water print.  It’s hard to tell from the picture, but the bodice is darted for better fit.  And of course, neck ties at the top.


IMG_6556


Here is the reverse side of the bodice.

IMG_6555

Here is the skirt.  The skirt is gathered, waistband is attached.

IMG_6558


Skirt ties pinned on and ready to stitch in place.


IMG_6562


Below, bodice and skirt has been stitched to waistband.  The waistband is pinned in place to be topstitched.


IMG_6561


Taa Daa!   Finished apron, the mermaid side.  I drafted the cute heart pocket.


joies apron


Here’s the reverse side.   The bodice looks darker in the pic, but is the same fabric as the skirt.


IMG_6565


Hmmm…this is a sticky wicket.


Geek alert!  Soapmaking technique stuff ahead.

(Update and unmolded at the bottom.)

I’m on a quest for an awesome individual mold swirl.  I have tried numerous batches and different methods.  Varying degrees of success, and some of them look beautiful, really great.  But still…I search for stunning.

moose and bear blu,purple, gr  paws soap 9.22.14          tie dye moose soap

The problem:  What pours out of the pot first determines the look of an individually molded soap. Whatever ends up on the bottom of the mold is what you see when it’s unmolded.

I tried a basic “in the pot” swirl”:  Pour color in a couple spots in plain batter and but I found the colors  muddled in the individual mold.

Next, tried pouring my colored batter in stripes on the plain batter.  Better, but not as good as I hoped.

Tried flicking colored batter across the molds, then pouring.  This actually worked really well, guarantees the colors will show in the finished soap.  (in the top two pics above, I did both flicking/ dribbling colored batter on the mold and also stripes of color batter on plain, then pouring)   But still…

As Winnie the Pooh says, “think, think, think.”  How about a mica-oil swirl, only instead of on top of a loaf,  dribble the mica-oil mixture on top of the plain batter as it is poured?  This is what I tried tonight.

I put about a half tablespoon of olive oil in a small stainless steel cup and added a heaping teaspoon of mica and mixed well.  Since I was experimenting, these are ballpark measurements; I mixed in enough mica for good rich color but still pourable/dribbly.

My soap batter was my regular go to recipe; excellent, but does tend to reach trace moderately quickly.  Knowing this, I soaped at lower temperatures.  Oils were about 95 F and lye mixture was about 100 F.  I wanted to work cooler, but…I got impatient.

I stick-blended to very light trace,  dribbled my mica-oil in lines on top of the batter and then poured into the molds.  I found that as I poured, it seems to work better if I started at the edge of a mold and moved the bowl slowly forward.  (Guess I’ll know when I unmold)

So, here are three just poured using this method.  I’m hopeful it works.  Possible problems I considered are oily stripes through the soap, too much oil for the lye amount.  I don’t think these things will happen, but who knows?  Sure pretty though.

Unmolding tomorrow evening.

   Photo   

And here they are, unmolded.  I like ’em!